White Label & Branding
White Label rebrands DefiniteSEO as your own product for clients. From one page you control four things: your branding (logo, colors, and company name), a custom domain that serves your dashboard and login on your own subdomains, your own email sending through your SMTP server, and a live report preview that shows exactly how a branded report will look.
This guide walks through every section and every field in detail. White Label is part of the Agency plan: without an active Agency subscription, the page shows an upgrade prompt instead of these settings.
On this page
Set your branding
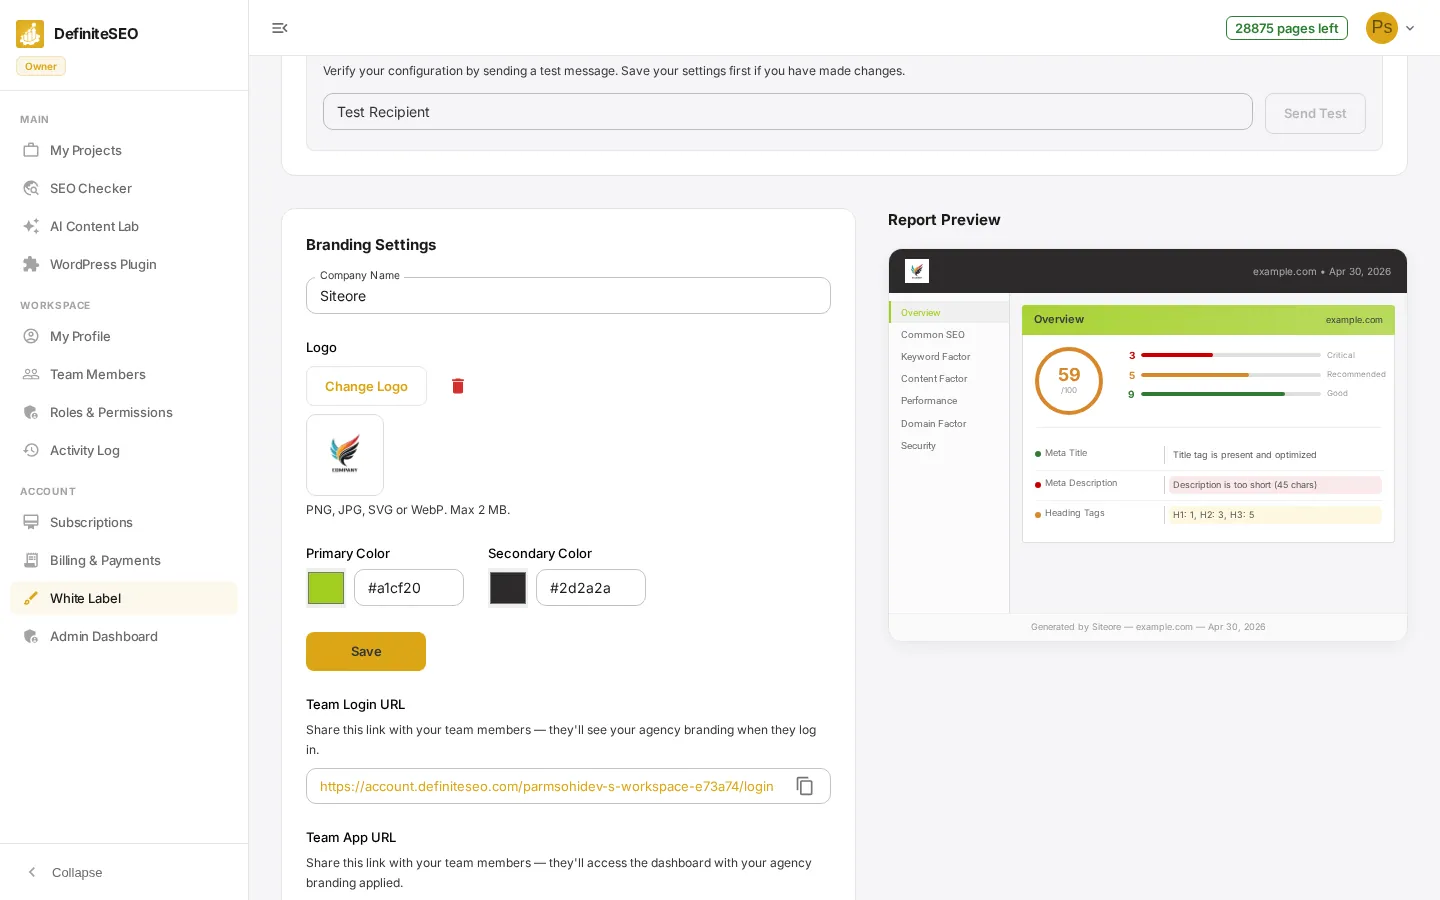
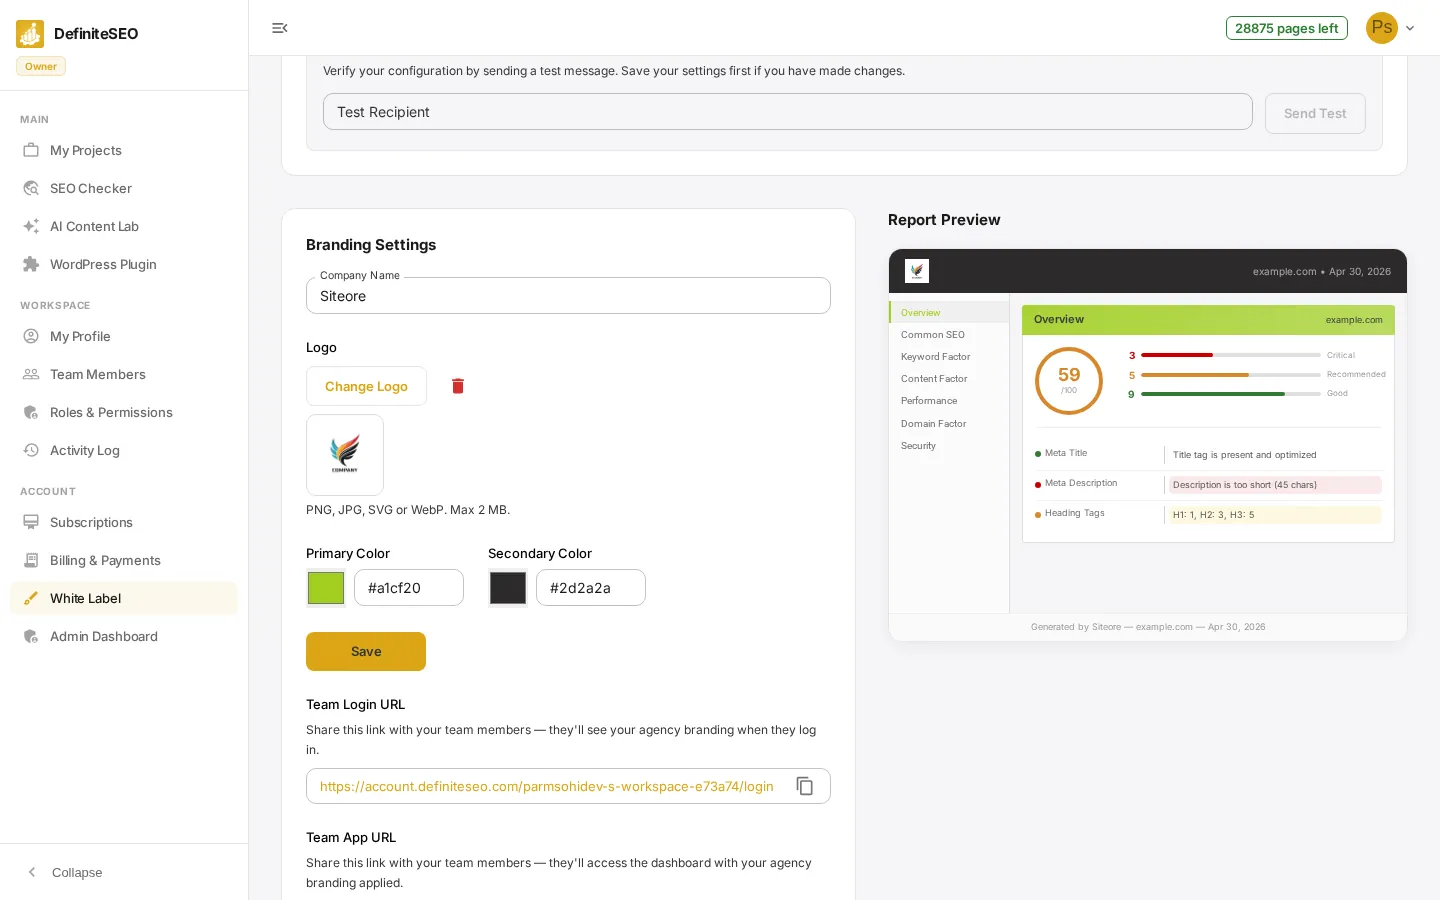
In the dashboard sidebar, under Account, click White Label, then scroll to the Branding Settings card. A live Report Preview on the right updates instantly as you type, so you can fine-tune the look before saving. Fill in the fields below, then click Save. You should see a green Branding saved successfully! confirmation.
- Company Name: Your agency name, shown in place of DefiniteSEO across branded reports and the dashboard. The field is optional; when left blank, the preview falls back to the placeholder text Your Company.
- Logo upload: Click Upload Logo (it reads Change Logo once one is set) to pick an image file. Accepted formats are PNG, JPG, SVG, and WebP, up to a maximum of 2 MB; a larger file is rejected with a Logo must be under 2 MB message. The chosen logo previews immediately below the button and appears on reports and the branded dashboard.
- Remove logo: When a logo is set, a red trash icon appears next to the button. Click it to clear the current logo and reset the file picker.
- Primary Color: Your main brand color, used for highlights and accents such as the active report sidebar item and the section header. Pick it with the color swatch or type a hex value (up to 7 characters, for example #DBA617) in the text field beside it. The default is #DBA617.
See 4 more checks
- Secondary Color: Your supporting color, used for the dark report header bar and other backgrounds. Set it the same way, with the swatch or a hex value. The default is #1E1E1E.
- Save: Saves the company name, logo, and both colors. While saving, the button shows a spinner; on success a green confirmation banner appears at the top of the card.
- Team Login URL: A read-only link in the form account.definiteseo.com/your-workspace/login. Share it with your team so they sign in under your agency branding. A copy icon copies the full https link to your clipboard. This appears once your workspace has a slug.
- Team App URL: A read-only link to your branded dashboard, in the form dashboard.definiteseo.com/your-workspace. Share it so team members open the dashboard with your agency branding applied. It also has a copy icon.
📝 Note White Label requires an active Agency plan. Without it, this page shows an Agency Plan Required upgrade prompt instead of these settings.
Connect a custom domain
In the Custom Domain section you serve the dashboard and login portals on your own subdomains under a single wildcard TLS certificate. Enter your Root Domain, Dashboard Subdomain, and Login Subdomain, then click Request wildcard certificate. DefiniteSEO requests one certificate covering both subdomains and then gives you DNS records to add at your domain provider.
- Root Domain: Your apex domain only, such as acmeagency.com (not www.acmeagency.com). It must be a valid domain with at least two labels and a real top-level domain.
- Dashboard Subdomain: The single subdomain your clients use for the dashboard, such as app.acmeagency.com. When you fill the root first, this field auto-prefills to app.your-root until you edit it yourself.
- Login Subdomain: The single subdomain for the login portal, such as account.acmeagency.com. It auto-prefills to account.your-root, and must differ from the dashboard subdomain.
- Request wildcard certificate: Validates your three inputs, then requests one wildcard certificate covering every subdomain under your root. On success you are told to add the CNAME record shown below to validate ownership.
See 9 more checks
- Validation status: Validation pending: A yellow chip while DefiniteSEO waits for your DNS validation CNAME to propagate. The page polls automatically and shows a Checking validation status spinner.
- Status: Certificate issued and Provisioning: After validation the chip turns to a blue Certificate issued, then a yellow Provisioning while DefiniteSEO sets up secure routing. A message explains your traffic CNAMEs will appear in about a minute.
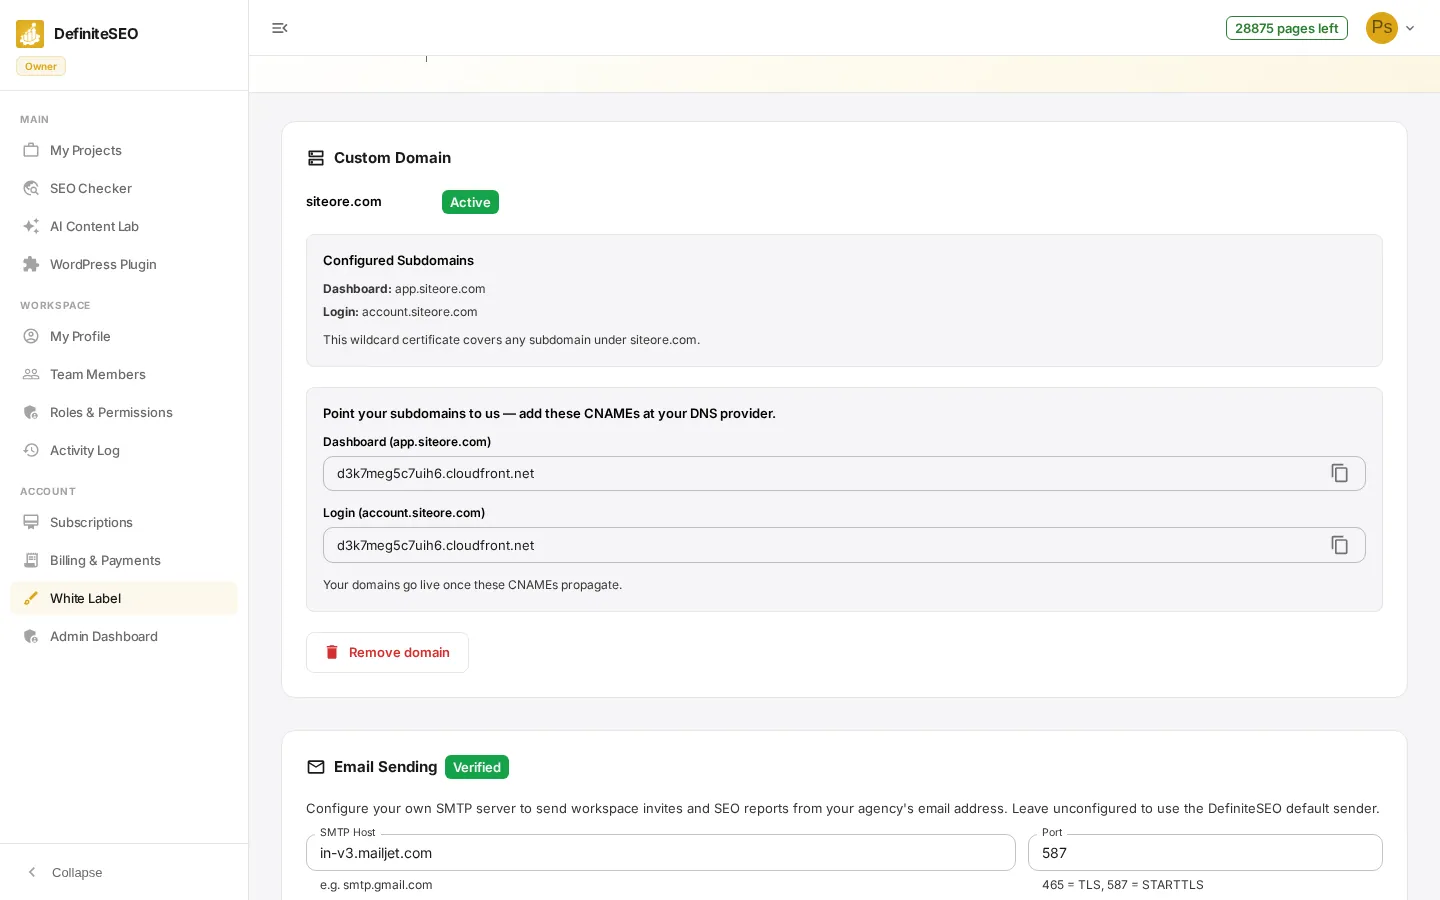
- Status: Active: A green Active chip means the certificate is live and the traffic CNAMEs are ready. This is when the Point your subdomains to us records appear.
- Status: Failed: A red Failed chip with an error message. A Retry button re-runs provisioning using the saved domain values, so you do not have to re-enter anything.
- Validation CNAME (Name and Value): While pending, the DNS Validation Instructions box shows one CNAME record with a copyable Name and Value. Create that CNAME at your DNS provider to prove ownership; validation can take a few minutes up to 30 minutes.
- Traffic CNAMEs: Once active, the Point your subdomains to us box shows a CNAME target for each subdomain (for example a cloudfront.net address). Point your dashboard and login subdomains at these targets; your domains go live once the CNAMEs propagate.
- Configured Subdomains: A summary box listing your configured Dashboard and Login subdomains and noting that the wildcard certificate covers any subdomain under your root.
- Retry again after polling stops: Automatic status checks stop after 15 attempts (one roughly every 55 seconds). When that cap is reached, a Retry again button lets you re-check manually after your DNS changes have had time to propagate.
- Remove domain: A red Remove domain button deletes the custom-domain configuration and returns the section to the empty entry form.
⚠️ Warning Request the certificate only when you are ready to update DNS. It starts a real domain-provisioning process.
Send reports from your own email
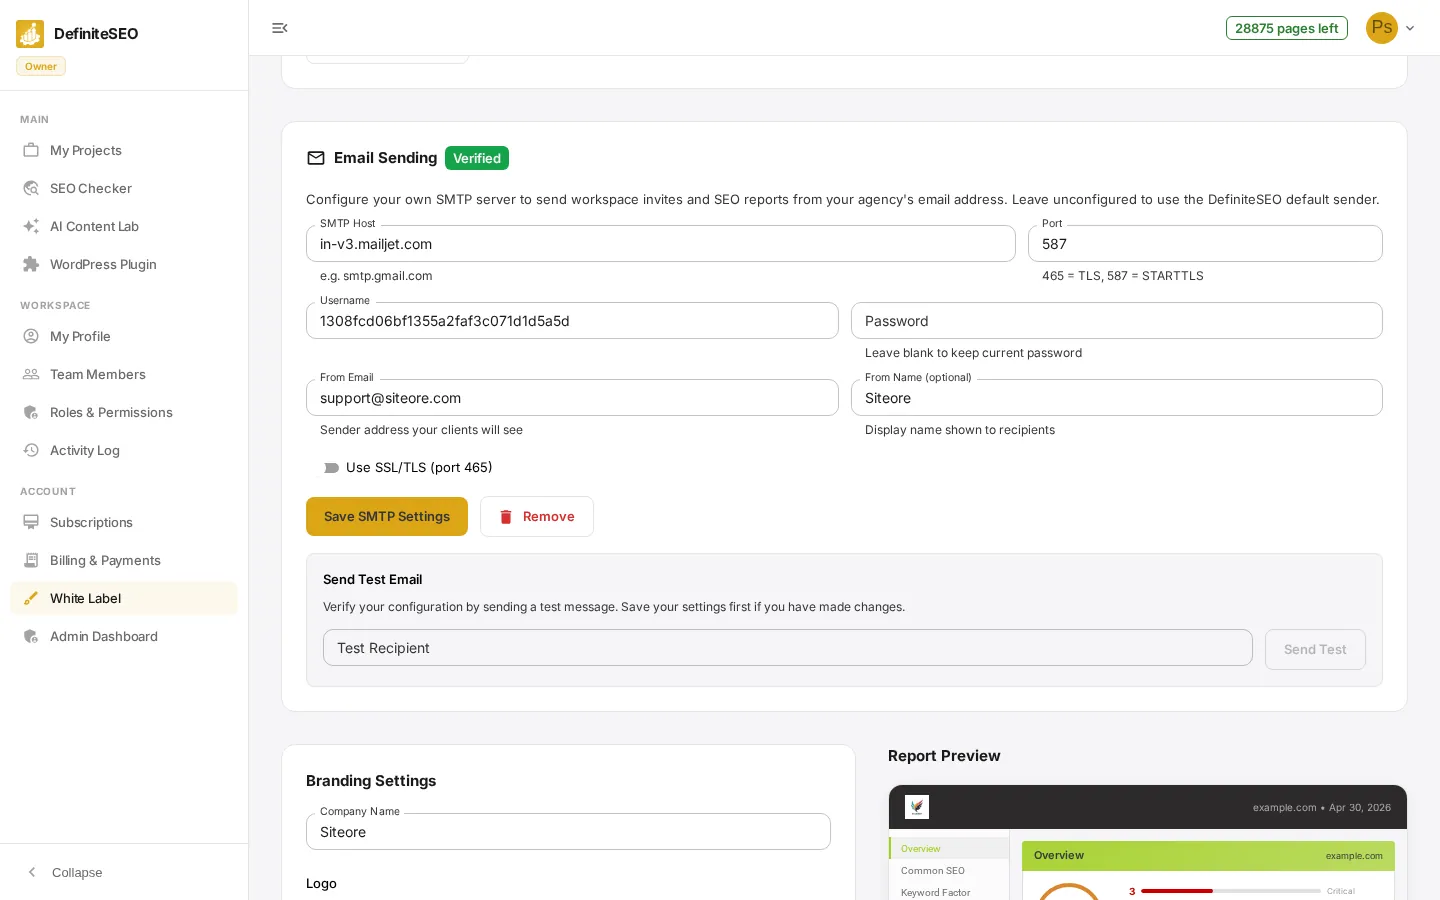
In the Email Sending section, connect your own SMTP server so workspace invites and SEO reports come from your agency address instead of the DefiniteSEO default. Fill in the fields below, click Save SMTP Settings, then send a test message to confirm it works. A status chip beside the heading shows whether the configuration is verified.
- SMTP Host: Your mail server address, such as smtp.gmail.com or in-v3.mailjet.com. Required.
- Port: The mail server port, accepted from 1 to 65535. The default is 587. Use 465 for TLS or 587 for STARTTLS, as the helper text notes.
- Username: The login for your mail account. Required.
- Password: The password for your mail account. It is never displayed; once a configuration is saved, the field shows a saved placeholder and you can leave it blank to keep the existing password. A password is required only when creating a new configuration.
See 7 more checks
- From Email: The sender address your clients will see on emails. It must be a valid email address. Required.
- From Name (optional): The display name shown to recipients, such as Acme Agency. Optional.
- Use SSL/TLS (port 465): A toggle that turns on SSL/TLS for secure sending on port 465. Leave it off for STARTTLS on port 587.
- Save SMTP Settings: Validates the form and saves your configuration. On success you see SMTP configuration saved. Only a newly typed password is sent, so re-saving without retyping keeps your current one.
- Remove: Deletes the saved SMTP configuration; emails then fall back to the default DefiniteSEO sender.
- Status: Verified, Failed, Unverified: The chip beside Email Sending reads Verified (green) once a test succeeds, Failed (red) if the last test failed, or Unverified (yellow) before any successful test. A failed test also surfaces the last test error.
- Send Test Email: Once a configuration is saved, enter a Test Recipient and click Send Test to send a real test message. Save any changes first; the result shows as a success or error banner.
⚠️ Warning Saving SMTP settings and sending a test email use your real mail server. Only do this with credentials you intend to use.
Preview your branded report
The Report Preview on the right of the page shows a sample SEO report with your logo, colors, and company name applied, exactly as your clients will see it. It updates instantly as you change the branding fields, so combined with your custom domain and email, every report you share looks like your own product.
- Header bar: Uses your secondary color as the background and shows your logo, or your company name (or Your Company) when no logo is set, alongside the analyzed URL and date.
- Sidebar and section header: The mini report sidebar and the Overview section header pick up your primary color, with the active item highlighted in that color.
- Score and findings: A sample score dial, Critical / Recommended / Good counts, and a few example check rows show the report layout so you can judge how your colors read on real content.
- Footer: Reads Generated by your company name, confirming the report is attributed to your agency rather than DefiniteSEO.
💡 Tip Changes in the branding section update this preview instantly, so you can fine-tune the look before saving.