Project Assignment
Project assignment controls which projects a workspace member can reach. Instead of giving everyone the whole account, you scope a person down to just the sites that matter to them, so a freelance analyst sees only the clients they work on and a client sees only their own website.
Assignment is most useful for the scoped roles, Analyst and Client Viewer. Owners and Admins always have access to every project in the workspace, so assigning projects to them has no effect. This guide explains exactly how to assign projects from the Team Members page, what the Assign Projects dialog does, how it interacts with each role, and how to assign projects at the moment you invite someone.
On this page
Open Team Members
Project access is managed one member at a time, so start on the Team Members page. In the dashboard sidebar, under Workspace, click Team Members. Each row in the members table represents one person you can scope, and the three-dot menu at the end of the row is where the assignment action lives.
📝 Note Owners and Admins can already see every project, so assignment mainly applies to scoped roles like Analyst and Client Viewer. Assigning projects to an Owner or Admin changes nothing about what they can access.
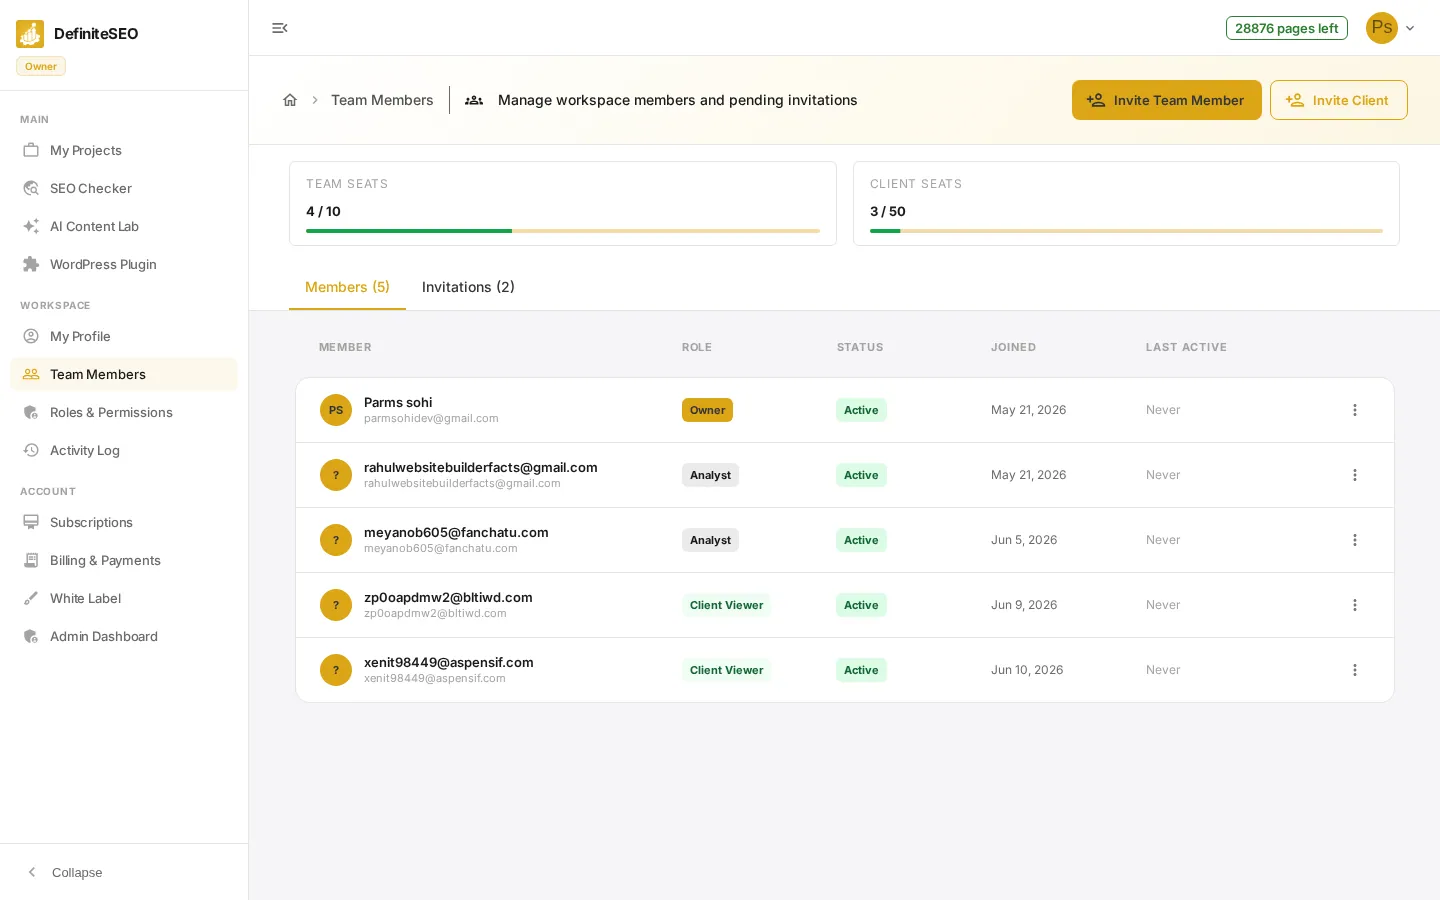
Open the Assign Projects action
There are two places to start an assignment, and both open the same Assign Projects dialog. Pick whichever is convenient:
- From the members table: On the member's row, click the three-dot Actions menu and choose Assign Projects. This option appears for every member in the list.
- From the member's profile: Click the member's row to open their profile, then click the Assign Projects button in the quick-actions row near the top. This button is shown only for non-owner members and only if you have the Assign Projects permission.
- Same dialog either way: No matter which entry point you use, you land in the identical Assign Projects dialog, so the steps that follow are the same.
📝 Note The Assign Projects button on a profile is gated by the Assign Projects permission, which Owners and Admins have by default. The menu item in the table is always available to people who can open the Team Members page.
Select the projects in the dialog
The Assign Projects dialog lists every project in your workspace as a checkbox. At the top it explains the rule it follows: it restricts this member’s access to only the selected projects, and leaving the selection empty allows all projects. When the dialog opens it pre-ticks the projects the member already has, so you are always editing their current access rather than starting from scratch. Here is how to use it:
- Tick the projects to grant: Check each project this member should be able to open. Ticking is additive: turning on a box grants that project, turning it off removes it.
- Their current access is pre-selected: The boxes start checked for whatever projects the member is already assigned to, so you can see and adjust their existing scope at a glance.
- Leave empty to allow all projects: An empty selection means no restriction: the member can reach every project in the workspace. This is the behavior the dialog describes as leave empty to allow all.
- Scroll for long lists: If you manage many sites the list scrolls inside the dialog, so every project stays reachable.
💡 Tip Because the boxes load with the member's existing assignments already ticked, the fastest way to add one site is to leave the rest as they are and just tick the new project.
Save the assignment
Click Save to apply the selection. The member’s access updates immediately: they will see only the projects you ticked the next time they open their dashboard. Click Cancel to close the dialog without changing anything.
- Save applies right away: Saving writes the new scope at once. There is no extra confirmation step, and the change takes effect immediately for that member.
- Recorded in the Activity Log: A successful assignment is logged as a Projects Assigned entry, with a detail line noting how many projects were assigned, so the change is auditable later.
- If something goes wrong: If the save fails, the dialog stays open and shows an error so you can try again without losing your selection.
⭐ Important Project assignment narrows what a scoped member can see, but it does not change what their role lets them do. To change their capabilities, use Change Role instead.
How assignment works per role
Project scope behaves differently depending on the member’s role. The two unscoped roles always see everything, while the scoped roles are limited to the projects assigned to them. On a member’s profile, the Assigned Projects section reflects this directly:
- Owner and Admin (unscoped): These roles can reach every project in the workspace at all times. Their profile shows this role has access to all projects, and any project assignment you make to them is effectively ignored.
- Manager, Analyst, and Client Viewer (scoped): Any role other than Owner or Admin is project-scoped. Their profile lists exactly which projects they hold, with each project's title, website URL, and the date it was assigned.
- A scoped member with nothing assigned: If a scoped member has no projects ticked, their profile shows no projects assigned yet, and the empty-equals-all rule means they are not restricted to a subset.
- Why this matters for clients: Client Viewer is a read-only role, so assigning a client to a single project gives them a clean, scoped view of just their own site and nothing else in your workspace.
📝 Note Because Owners and Admins are never restricted, project assignment is the tool you reach for with Analysts and Client Viewers, the roles whose access you actually want to narrow.
Assign projects when you invite someone
You do not have to wait until a person joins to scope them. When you invite an Analyst or a Client Viewer, the invite form shows a Projects selector so you can choose their projects up front. The person then arrives already scoped to exactly the sites you picked.
- Only for scoped roles: The Projects selector appears in the invite form only when the chosen role is Analyst or Client Viewer. Roles that always see everything do not show it.
- Pick projects before sending: Select one or more projects in the invite dialog, then send the invitation. Those projects are attached to the invite.
- Leave it empty for full access: If you send the invite without choosing any projects, the same empty-equals-all rule applies and the member is not restricted to a subset.
- Adjust later anytime: Whatever you set at invite time can be changed afterward from the Assign Projects dialog, so the initial choice is never permanent.
💡 Tip Assigning at invite time is the smoothest path for clients: they sign in for the first time already seeing only their own project, with no extra setup from you.